Tips and Tricks eBlast:
Imports/Exports Edition
Export Employee Information
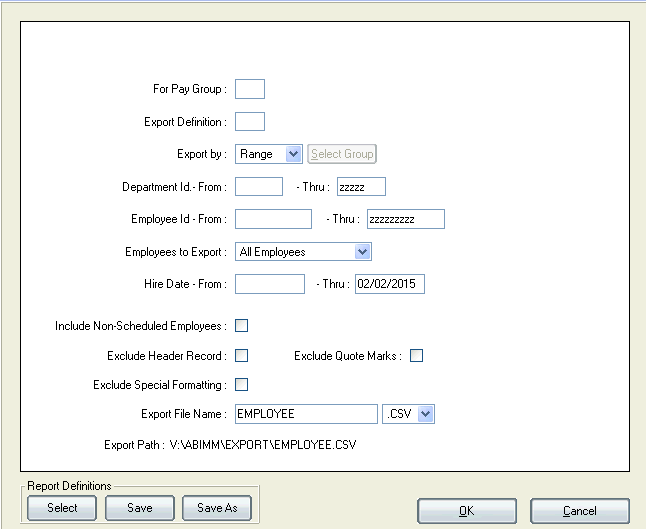
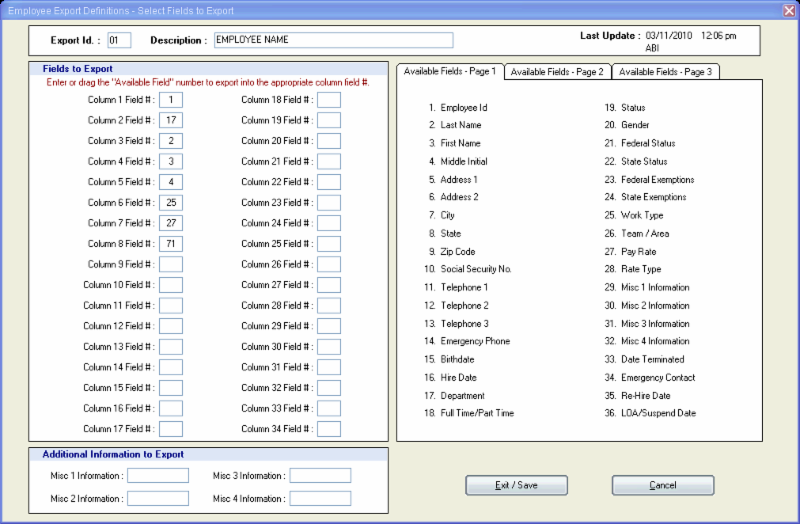
When it comes to exporting, sorting, or analyzing raw employee information stored in ABIMM, the Export Employee Information utility is one of the most powerful tools you can utilize. The key benefit of this utility comes from ABIMM’s Export Definition setup (see below in Image 2). Here you can select from a list of over 100 available employee data fields to export and choose the order you want them to appear in. Additionally Separate by the Department(s) Range, Employees, Hire Dates, and more to filter the exported information. The file will be exported as a .CSV or a .TXT to the ABIMM folder on your local drive.

Image 1

Image 2
Copy Files to Network
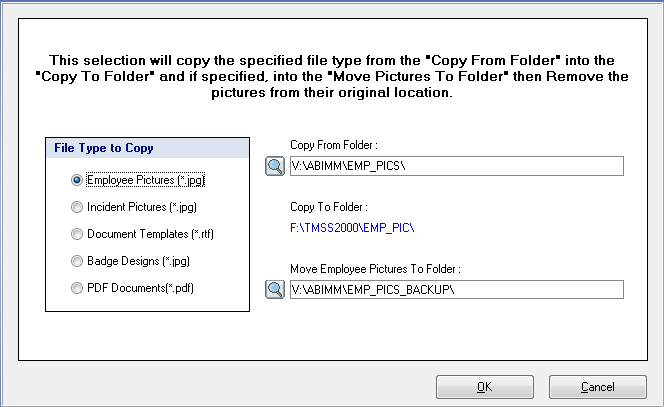
Have you ever had multiple files or images that you needed to upload to the system?Whether it’s employee pictures, credential background images, PDF documents, or pictures from the Incident Manager module, the Copy Files to Network import will help move all the files from a selected folder into your database effortlessly. To find this utility, you’ll need to navigate to System Administration > General Utilities > Copy Files to Network. Whichever type of file you’re importing, the process remains the same. First, specify the folder to copy from, by clicking the magnifying glass to bring up a Windows Explorer box. To find your local C: drive type in “V:\” and browse to find the folder to upload files from. Optionally, you can choose a backup folder that the system will move your files to after copying is finished. This is beneficial to keep track of new files and import in smaller batches.

Image 3
Copy Pictures From Network
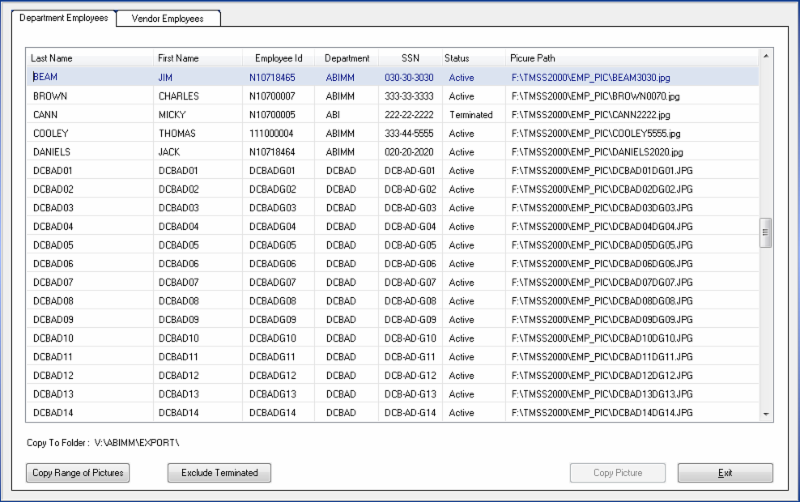
Are you copying your employee pictures to the database from multiple computers? Do you need the photos in ABIMM downloaded for other uses? If so, you may not have a single location with all employee photos, other than your ABIMM database itself. If you ever need a local backup of employee pictures, the Copy Pictures From Network can help you copy selected (or all photos) from the system. This utility can be found in System Administration > General Utilities > Copy Pictures From Network. An individual picture can be copied by selecting the Copy Picture button at the bottom right, or copy multiple images with the Copy Range of Pictures found at the bottom left. When copying a range, specify the departments, or you can leave the range blank for all departments. Then, choose to rename the photos or uncheck the box and they will export as LASTNAME+LAST 4 SSN (Image 4). The system will display the folder path containing the images. In this example, they are in the V:\ABIMM\Export folder (Image 5).

Image 4

Image 5


